
Showing posts with label technical. Show all posts

Monday, December 20, 2010

*** Fujitsubo installed!

This weekend Kev and I installed the FGK goodies that arrived a few weeks ago. Once again my Trueno was on the ramps of GH heavy lift division and we started dismantling my old Apexi N1 Evolution catback, old mild steel 4-1 manifold, and the horrible decat/ECV pipe monstrosity!
 

With the exception of two rusted bolts on the catback, everything came out easily. The strut brace and distributor cap were moved to swap manifolds. Here is the shiny new Super Ex in its virgin stainless steel colour. It has since turned a lovely shade of gold in its new home!


FGK thought of and supplied everything we needed, and I mean everything, down to the last gasket and washer. Here is the nice bracket that supports the lower end of the collector where it joins the next section. The bracket bolts to the bellhousing and then a U clamp and support secure the collector to it . You can also see the spring loaded bolts that hold the next section against that tough donut type joint. It gives a perfect seal but still a little flexibility (not tightened up yet in this shot).


Things started to shape up very nicely as we added all of the sections. It was such a pleasure working with brand new parts and clean nuts and bolts. Everything just fits together so easily! The FGK system follows a neater line under the car and is higher up off the ground than the old system. I haven't scraped it off anything, yet.. I will probably cry when I do but still will not raise up the car haha. At least the down pipe has a part number etched into it so can be ordered separately if I ever kill it during full compression on a some nasty bit of Irish road...


You can see the new location of the O2 sensor just after the collector, the factory sensor is retained, using a cable extension kit, new gasket, and more new bolts supplied with the kit. 
Final tightening of all the bolts was left until everything was lined up and in place. The only unexpected thing was having to disconnect the rear coilovers to the fit the muffler over the axle, as the "S" section is a bit longer than on the N1 and joins the midsection in front of the diff rather above it....


...which brought us nicely to the muffler! My measurements worked out just right and the twin tips fill the exhaust space perfectly! I'm very pleased with the slash cut tips too, very nice quality..


The coilovers were then reconnected, strut brace and distributor cap reset, and the car quickly put back on the ground so we could finally start it up to hear it....and get that lovely new exhaust smell. It certainly has a much quieter idle than the old system, but has a suprisingly sharp clean sound when revved hard, the Super Ex and stainless decat making themselves well known through the back box. Some flames were even coaxed from it with enthusiastic revving, and I discovered that when you get back on the throttle after a high rev lift off there are some lovely pops out of it. Its the best of both worlds, quiet and calm for normal driving but it still comes to life when you drop a gear or two.


Another nice job complete and Fujitsubo is GarageHachi approved :)

Monday, November 8, 2010

My Levin refresh ^^^

My "daily" Levin has been off the road for about 3/4 months now so it's about time to get back driving it! I miss the fun of driving/drifting my hachi every day.A few small jobs built up over time on it so I gave it a rest as I planned and saved for a few parts.
The weekend just gone I push started it and got it down to my daily work garage and got started on it.
First off was to charge the battery and strip it down for a timing belt kit and vvt cam gear change.


Along with the (hopefully good ) used vvt gear and timing belt it got a new Toyota tensioner and idler pulley.The old cam gear was rattling away like mad and this is my 2nd time to change it so I hope I got lucky with this gear as Toyota want 350+ euro for a new one!!

  
It all went back together then with a full cooling system full of fresh coolant for the winter!
As it was sitting up for a few months , the starter finally gave up on me, it was starting to go even before I let it sit up idle.So now was the right time to pull it out and get it re-con'd .So thats where I left it Sunday, I should have the starter back tomorrow. 

 I'm REALLY looking forward to getting back into my Recaro for a bit a drifting over the winter, even the short trip to the garage had me excited again!!!!

So that's my timing belt , battery and starter motor sorted now, next in line is a good boot lid, which I just picked up tonight , and a big thanks to the mega cage builder Roco Ronan for that, not a spot of rust on it!!!! 
Along with the boot lid , I have found two small patches of rust under the boot seal , which is causing a leak so that will be sorted when the boot lid is getting done very soon hopefully. I'll update with some pic's as soon as possible.


Monday, October 18, 2010

T50 swap


Ever since I got my car there has been a bit of a shudder up through the gearbox on the off throttle over-run. It was pretty bad in 3rd and 4th gears, and over the last few months it has been getting worse, starting to get quite noisy when on throttle too. So a gearbox overhaul, or swap at least was added to the list. Being my daily I couldn't have the car sitting up for more than a day with no transmission so I picked up a cheap 2nd hand T50 from the local forum, and hoping for the best, once again my Trueno was flung up on the ramps of GarageHachi heavy lift division!


Actually flung is not the right word, carefully maneuvered and manhandled is more like, it as due to  plenty of "moAR low", sleepers, spare wheel jack and trolley jack are needed to get her on the 2 post lift..


 The old gearbox came out with no stress, and we discovered yet another coolant leak caused by a loose heater hose, that was quickly put back into place and will hopefully end of that orange on my hachis underbelly! A nice suprise that we found living in the bellhousing was a Fidanza uprated flywheel, and a spurious ebay looking clutch with a bit of life left on it. (Will eventually be replaced by one of  Exedys or Oguras offerings).

Fidanzeh, yer dinners ready!
   

The new gearbox was put in at a leisurely pace, mount, fork, bearing and speedo drive swapped over, filled up with fresh 75W90, and after final checks we went for a quick test run. The new box was really quiet, and through my C's shifter it felt a little more precise up and down through the gears, so I was smiling as I was approaching a roundabout....


...until I tried to shift down to second from third. Nothing. Just about 6000rpm and no forward motion! F&*^£$(! It would absolutely not go into second unless the car was stopped. So I cruised back round to GH and back on the ramp she went. The box was pulled out in a matter of minutes pit lane style and the original went straight back in, giving us enough time for lunch (Wonder what the record for a t50 swap is?).


   Once the car was on the ground again the split case was prised apart to feast on its insides and try find the problem. Initial examination by Dr.Kev revealed a worn blocker ring on 2nd gear, so we just cleaned out the box and wrapped her up for transport to and later surgery in GarageHachi workshop division.


I was hoping a quick swap would be the end of an annoying noise, but now this will become a tasty gearbox refresh, as the "while you are doing it you might as well.." rule of tuning comes into play. By the time it is done it will go back in mated to a new clutch, spigot and release bearings, and the slave cylinder will be also replaced as it was noticed to have started leaking.. And then theres no point changing the slave without installing a neat braided clutch line by APP... At least my shifter is complete..

Sunday, September 5, 2010

more low weekend! **

before lowering


At long long last we got around to installing coil-overs on my Trueno this weekend. The photo above is the last time that the space between the wheels and arches will ever be seen!

We started by opening up a second hand set of Japanese coil-overs I picked up a while back. I had also purchased second hand barely used MCN/AVO inserts, as we did not know what inserts lay inside the new tubes.


To our pleasant surprise a PERFECT set of short stroke adjustable TRD/Tokico blue inserts were there. So they went right back in...


I spent a bit of time cleaning the spring perch threads with the wire wheel machine...


Here Kev reinstalls the cleaned Cusco adjustable top mounts..


And after the brake discs and new bearings were transferred over from the old struts, and a quick coat of satin black for freshness..


They were ready to meet the new Australian made 40mm RCAs from AJPS.


Front end off the jacks and things were looking good!


Attention was then turned the rear, and some squishy "Vmax" 35mm lowering springs fell out, along with a pair of standard Monroe shocks.


Leaving this handy shelf for coffee when working on the back end of the car!


The new MCN/AVO rear coil-overs are so easy to install, and height adjustment is very easy - just jack up the car, let the axle hang, and then turn the perch to the correct height..


After a few adjustments and final checks:

I HAVE STANCE!! :)


And then off to Mondello to take in some Japfest and Prodrift action.


The front is a still a tiny bit too high, so I will wind it down a few mm to get the correct subtle nose down stance I want, and the lateral rod must be adjusted slightly too, and after that its some more tracking and camber settings, but even straight off the jacks the car feels so great. The 6kg front and 5kg rear springs are perfect for the rough Irish roads, but the car still feels stiff and sporty. I have to experiment a bit and do some track days to find the correct settings for the front and rear dampers but I'm very very happy with the drive. Not to mention arch gap is well and truly deleted!

Monday, August 2, 2010

heater hose fix

blood splatter?

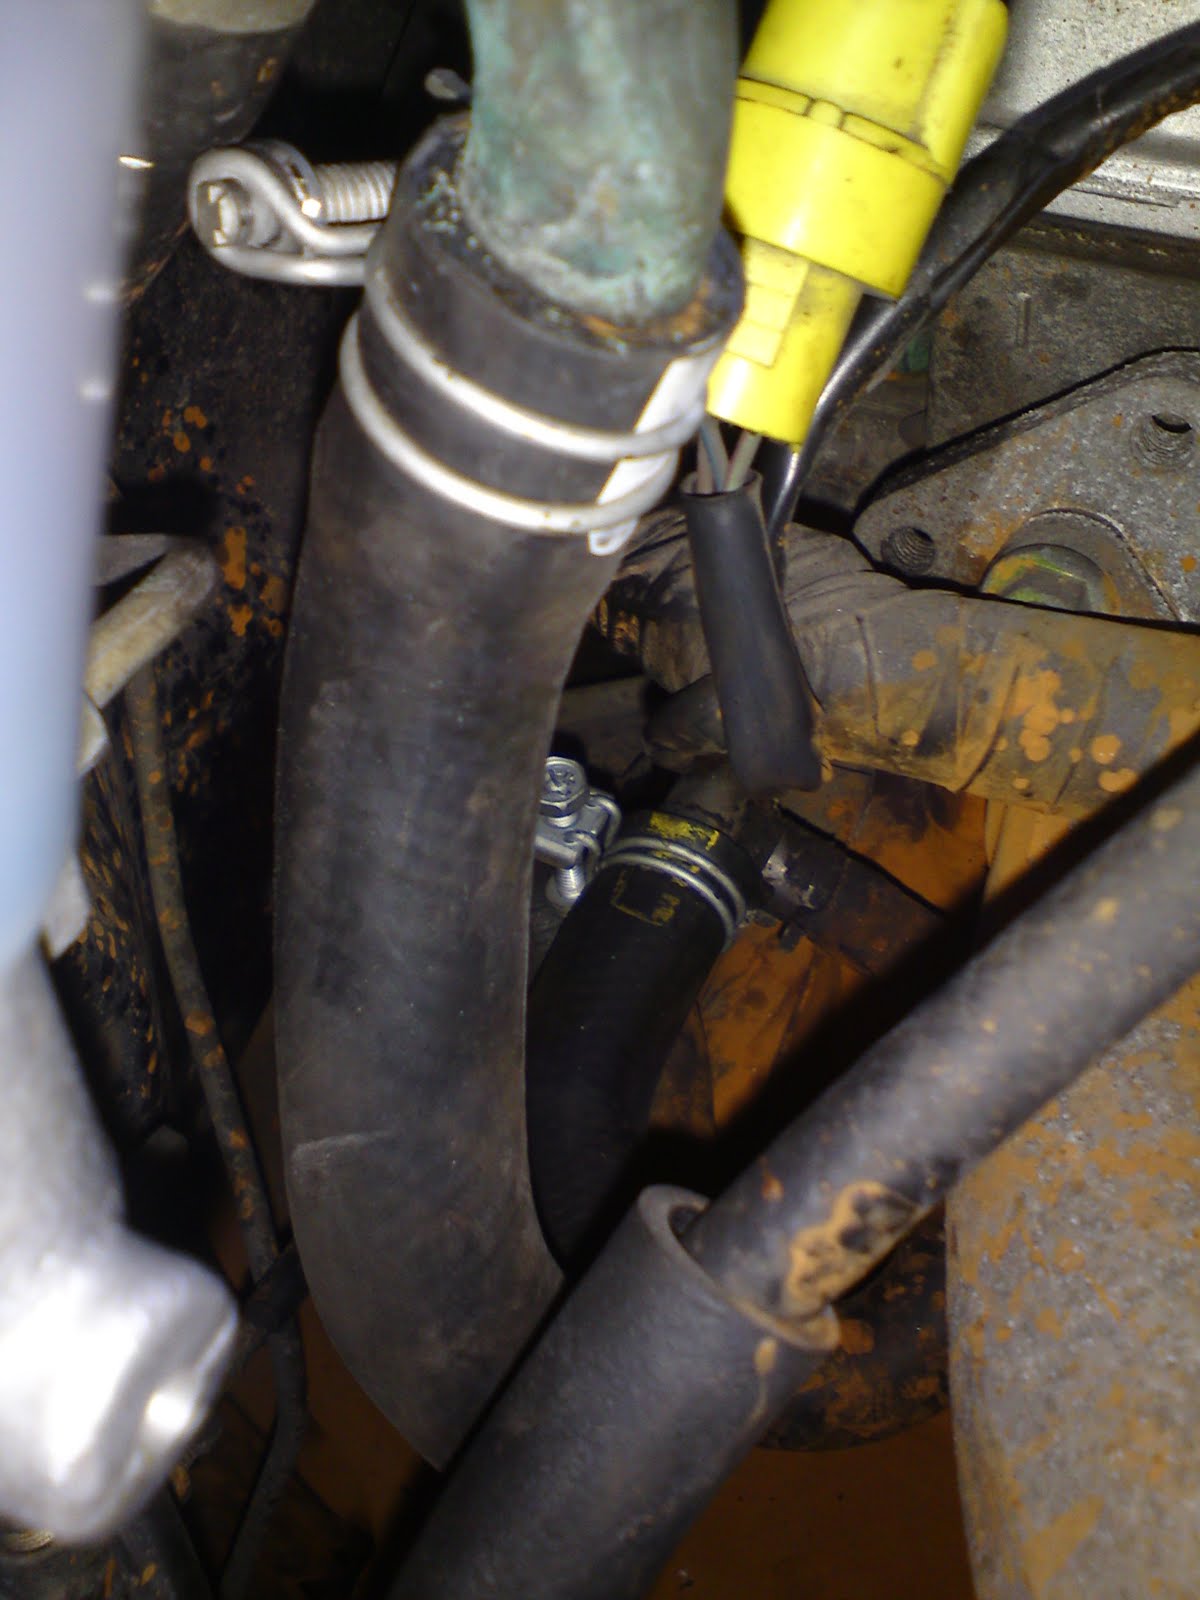
The heater feed hose was leaking in my Trueno for the past couple of weeks, what started out as a small drip down the block just got worse until most of the block and a lot of the bay was a horrible orange rusty colour, and I was having to top up the radiator every morning before driving to work.

top left hose

The coolant was not very clean and the header bottle needed serious washing out, so I suspect that for a period somewhere in its life the engine had only water in it, so it was losing out on the anti-corrosion properties of the coolant/antifreeze. I wonder what the inside of the water galleries are like!? I have flushed it out and refilled it with a mix and will do it again in a couple of weeks and see if I can get most of the muck out of the system, though a fresh radiator is now in mind for the future.


One new hose and two new clips were ordered direct from Toyota and came in the post a couple of days later for less than €30.  Access to the hose is much easier when you unbolt the vacuum sensor from the bulkhead, otherwise its a simple job. The hose that I took out was in very bad condition, with many snakebite holes after appearing. I suppose after 23yrs the rubber starts to perish a little lol :)


Anyway I checked the other heater hoses, they seem ok for now, but at least they are cheap for replacements, and I think I will get a set of those nice Samco hoses that Kev got (but in black) when I put in a new radiator someday.

job done.
I gave the engine bay a quick and careful powerwash afterwards but that cooling system silt or whatever it is is thoroughly baked onto the block. Guess it will have to come out to be cleaned and painted next year!
I'm still waiting on some 40mm RCA's to arrive in the post which is holding up the coilover install otherwise my '86 is going great...

Monday, July 26, 2010

new oil pressure sender


oem sender / adaptor / new digital sender

I have my sPa Design DG200 series gauges a few years now, and the oil pressure sender didnt survive the trip from old car to tool box to new car very well, so a new one was ordered up from sPa. The sender thread is 1/8NPT (national pipe thread), but the hole in the block and the OEM Toyota pressure sender are as far as I can determine, 1/8BSPT, (british standard pipe, taper) which is a funnily enough a TAPERED thread. The two threads are not compatible for many reasons, and tapered threads are especially important where a few bar of my oil pressure are concerned, so a neat little 1/8" NPT Female to 1/8" BSPT male adaptor was sourced from the helpful folk at ThinkAutomotive, the company behind the MOCAL range of oil coolers and fittings. The adaptor was less than €10 posted, and is of a much higher quality design than some of the LMA fittings that Demon-Tweeks sell. Remember this??  
The adaptor arrived today so I'm delighted that everything screwed in perfectly by hand, so tomorrow I will reinstall it and run the cable, and at last will see something other than an error message on the #2 gauge.


dirty little 4age
  Anyway, sPa also sent me a new block connector, so once the sender and adaptor are in nice and tight into the block, I will wire it in such a a way that the elbow connector is pointing neatly towards the wiring loom and not something awkward like a toasty exhaust header..

not fun through grommets
 

Place your bets now on what max oil pressure I will see :)

Dave

Saturday, June 12, 2010

* new 4age brain!


I've had this little beauty for a while now, an Apexi Power FC ECU, with Hand Commander. It came at a price I just could not refuse when I was buying the car so I snapped it up for the future project. This replaces the factory ECU and will allow full fuel and ignition mapping which is a must for any serious engine tuning. Apexi never made the Power FC for the AE86 specifically, but they did make them for the transversely mounted 4ag's that live in FWD AE92 Corollas. Luckily, aftermarket companies such as AP Engineering in this case reworked the Power FC for the AE86 and thanks to their neat wiring harness this unit is completely plug and play. No messy wiring,and factory connectors, sensors, and mounting positions are all the same. Speaking of sensors, the Power FC uses the factory MAP sensor, which doesn't suit an ITB application so well but does suit my full ARC intake setup (more on that later!) or even turbo setups perfectly.


The hand commander is a neat little unit that allows you to keep an eye on most engine parameters as well as make a few changes in car such as idle speed and rev limit. (2500rpm is funny to hear!) I have read that it is possible to adjust the maps with it, however full mapping is best done with the correct software via laptop on a rolling road, and I already have my two 52mm gauges telling me everything else I need to know, so this commander will not be on display on the dash.


The one thing that I will have to change to accommodate the new ECU is the injectors however, as the big port 16v uses low resistance 3-4 Ohm injectors, but the small port (ala AE92) 16v uses higher resistance injectors (10-12Ohm approx I think). I found this out when I plugged in the PFC for a test run, the car started, idled and ran fine, but on my first journey up towards the redline the 10amp injector fuse blew. Better the fuse melting than the PFC! Either way, I soon sourced the correct high resistance small port injectors from ebay, and when the new HKS head that Kev is kindly working on is installed, we will put in the new injectors, ECU, and over to Westward Eng. for a remap session on the dyno. Can't wait :)