Sunday, September 5, 2010

more low weekend! **

before lowering


At long long last we got around to installing coil-overs on my Trueno this weekend. The photo above is the last time that the space between the wheels and arches will ever be seen!

We started by opening up a second hand set of Japanese coil-overs I picked up a while back. I had also purchased second hand barely used MCN/AVO inserts, as we did not know what inserts lay inside the new tubes.


To our pleasant surprise a PERFECT set of short stroke adjustable TRD/Tokico blue inserts were there. So they went right back in...


I spent a bit of time cleaning the spring perch threads with the wire wheel machine...


Here Kev reinstalls the cleaned Cusco adjustable top mounts..


And after the brake discs and new bearings were transferred over from the old struts, and a quick coat of satin black for freshness..


They were ready to meet the new Australian made 40mm RCAs from AJPS.


Front end off the jacks and things were looking good!


Attention was then turned the rear, and some squishy "Vmax" 35mm lowering springs fell out, along with a pair of standard Monroe shocks.


Leaving this handy shelf for coffee when working on the back end of the car!


The new MCN/AVO rear coil-overs are so easy to install, and height adjustment is very easy - just jack up the car, let the axle hang, and then turn the perch to the correct height..


After a few adjustments and final checks:

I HAVE STANCE!! :)


And then off to Mondello to take in some Japfest and Prodrift action.


The front is a still a tiny bit too high, so I will wind it down a few mm to get the correct subtle nose down stance I want, and the lateral rod must be adjusted slightly too, and after that its some more tracking and camber settings, but even straight off the jacks the car feels so great. The 6kg front and 5kg rear springs are perfect for the rough Irish roads, but the car still feels stiff and sporty. I have to experiment a bit and do some track days to find the correct settings for the front and rear dampers but I'm very very happy with the drive. Not to mention arch gap is well and truly deleted!

Wednesday, September 1, 2010

Back end Build

So I dropped the rear axle and got to work on it! Was gona go with a larger liteace axle but Ive decided to stick with the ae86 axle now. I striped it down totaly bare ,sanded it and got it ready for some satin black, rattle can style!


I built it back up using t3 fully rosejointed adjustable 5 link , trd roll bar and mcn/avo short stroke coilovers


now just waiting for funds to allow for new shafts and final drive setup, should have it fitted to the car this weekend , while I wait for other parts


Monday, August 30, 2010

Front end back on.....

....but still needs a couple more tries at lining up the headlamps vs wings vs frp bonnet, melter!!
its jacked as I'm gona whip out the axle and rose-joint the rear end this week...

Saturday, August 28, 2010

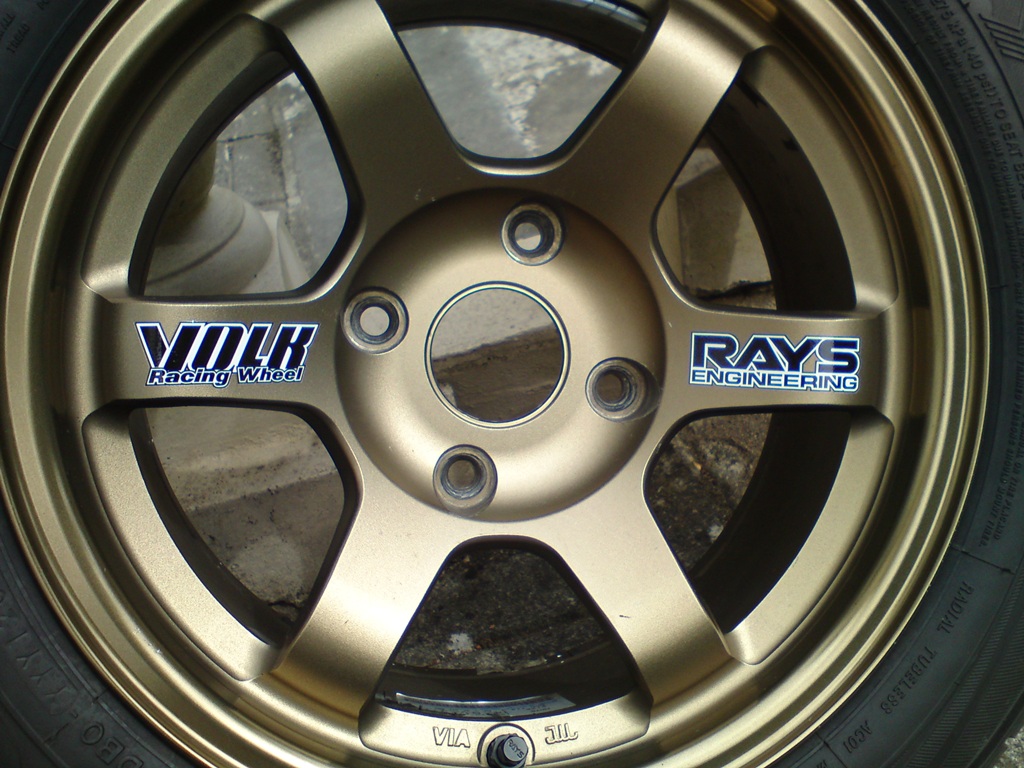
^^Wheel refurb complete!

Today was a nice day, the Trueno got some mega love..
First of all the car was up on axle stands so the 4 trusty but tired looking TE37s could be removed. The stickers were very faded and cracked, and not much remained of them after 10 years of road and powerwashing!


So armed with some choice products from the detailing shelf...


... I went to the local carwash and gave them a very thorough cleaning. The AG Custom Wheel Cleaner is safe for use for anodized and other less common metal finishes so I was happy using that on the gorgeous bronze metal..


The power hose also made short work of the remaining decals, so I was left with a spotless grease free surface.


And now for the really satisfying part! My new OEM decals from RAYS all the way in Japan.


gently...
 

The results speak for themselves!! and with some wheel sealant and tyre shine later,


All done! The car is still too shamefully high to put up a picture of them fitted but the car was also given a super clean today to match the wheels, along with a fresh coolant swap and some other small jobs..

And now for many beers :)

Project StanceWorkz

I played around with my rear coilovers today! I got the angle grinder out to the dmax overfenders to take the inner lip off them! results are satisfactory Lowness!!


Hachiroku vs gt300 class

Cool retro jap video of the gt300 class Trueno! Theres not much of an ae86 left in it tho ,as it uses a tunned 3sgte. But still cool to see the lengths a hachi can be pushed to


Friday, August 27, 2010

random pic: 2 door on TE's


I am really looking forward to getting my coilovers in, and changing to a standard rear bumper with no skirts, so I am searching the net for pics of super low 2 door Truenos on TE37s for inspiration in the mean time...
Not very low and the tyres seem quite big but its a nice start!

edit: the more I look at this pic the more I really like this car! its so subtle it takes a while for the details to sink in. TE's are awesome in gloss black, and really suit the colour of the car, which also tasty. And it has less arch gap than my car haha. good work to whoever owns it :)

Thursday, August 26, 2010

** E.C.V. flip reverse

I haven't needed to do much to my Trueno lately, she has been a dependable daily driver, and I have been taking it easy on the parts buying trying to save some money, so there has not been much bloggable action!


But today my Apexi Exhaust Control valve jammed, so while it was out it was a good opportunity to reposition it. As I have no welding powerz I had to get the rusty old decat pipe lengthened in an exhaust shop to meet the new 4-1 manifold I put in months ago, but the lads in the shop flung the valve in too while they were at it seeing as the car was already on the ramp. I was never really happy with its place as the lowest object underneath my car, as it often scraped the ground. My 86 is not even low so it definitely had to be moved before the coilovers go in!

scrapeyscrapey


Anyway back to the original fault, the two screws holding the butterfly to the spindle of the ECV had worked themselves loose, and only one remained in the pipe,luckily I was driving easily today, so I screwed it back in and loctited it in place.


After that it was a quick job moving the valve, and it is in a much safer position tucked up near the heat shield away from the ground.


 As expected I do need to replace all 3 gaskets now. I made up a ghetto emergency one using layers of tinfoil, which works suprisingly well! Only a tiny leak, but it will last until the weekend and I buy some new ones haha..

the decat pipe of shame but it works!


Everything in and job done, now the only thing hitting the ground should be the zenki lip on the front bumper in a couple more weeks!